Do you also come under those music producers who have a dream to build their own Home Studio Setup, But lack the budget? Well, in this modern world, there’s no need to worry or have a second thought about it. You can have your own Home Studio Setup Under $500, Best home studio setup under $300, etc.
I know how big the decision is to go from Zero to One. You have a dream and you want to make it real. Buying the gadgets and making your own home recording studio setup is the first and the most important step that you’ll take in the path of success as a music producer.
Now, every person has their own capacity of spending on the gears, Of course, everyone wants the high-quality results but vary on the budget part. Well, I am here to give you the Best Home Studio Setup gears for every budget.
You may be thinking how’s this possible and is it even possible to produce a high-quality sound using a Home Studio Setup Under $500? The answer depends totally on different factors. So let’s dive into the session and you’ll get your answer in the blog.
Contents
Introduction
If you think that owning a world-class recording studio is only the way to produce world-class music, then you are lacking behind in this world. With time, there has been a lot of modernization and technology that has shrunken and is available at an affordable price.
Producing the best quality music isn’t always about spending millions of dollars on it. Today talent is all matters in every field.
In this blog, you will get the answers to each of your questions like – What are the Home Studio Essentials, How are they used, Which are the important ones and what can I exclude, Everything. Just be with us till the end, and after finishing the blog, you’ll have all the knowledge of having your own home recording studio setup under $500.
Home Studio Essentials
Okay, So let us first know what are the gadgets or gears that are required, or say essential for a home studio setup. Let me tell you something, You can Start producing music from your home by just using DAW Software on your Laptop and a Studio headphone. Rest all is dependent on your skills and talent.
There are many music producers who make music using just these two gears. But since your budget is around $500, just imagine what you can do with it.
So let’s focus on some of the Home Studio Setup Essentials that you will require to build your own home recording studio.
Home Studio Essentials
Audio Interface | Focusrite Scarlett Solo | |
M-Audio Air 192-4 | ||
PreSonus Audiobox USB 96 | ||
Monitors | Kali Audio In-5 | |
Focal Shape 50 | ||
Kali Audio LP6 | ||
Microphone | ATR 2500X - USB | |
AKG P120 | ||
Audio Technica AT2020 | ||
MIDI Controller | AKAI Professional MPK Mini | |
Novation Launchkey Mini MK3 | ||
Arturia Minilab MK2 | ||
DAW Software | Audacity | Free |
Garageband | Free | |
Ableton Live Lite | Free | |
Computer | New | Exceed Budget |
Second Hand | Recommended | |
Preowned | Free | |
A Space | Owned | Not Recommended |
Rented | Partially Recommended | |
Bedroom | Recommended |
1. A Space/Room
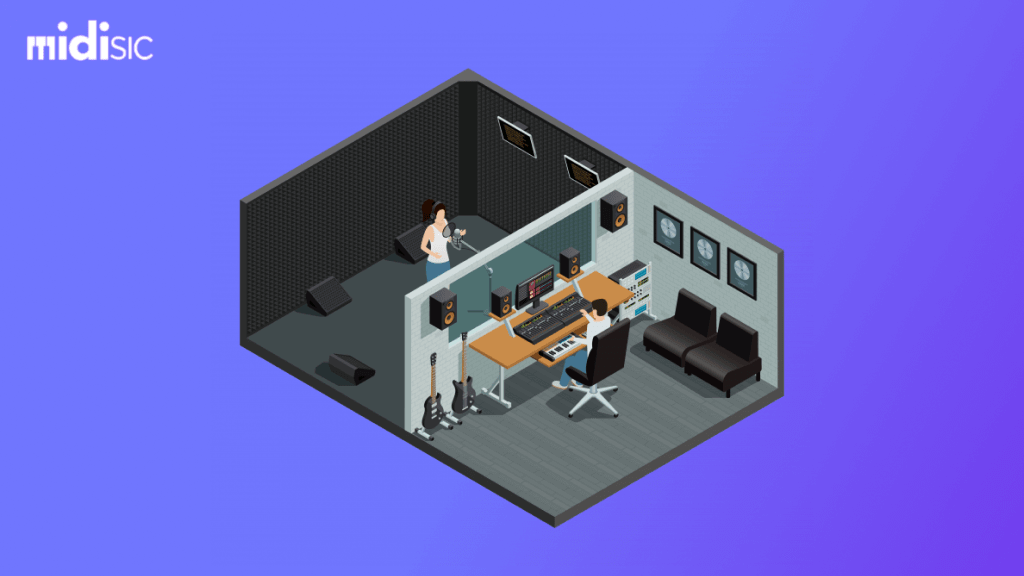
The initial and the most important thing you will require is a space where you set up your home studio. Now, as we are talking about a Home Studio Setup, that space/Room should or could be a small corner of your house.
There are many young music producers who can’t afford a special room for themselves that can be converted into a proper home recording studio. So for them, Just don’t let yourself down. You are in the beginning phase of music production, and you don’t need a huge spacious room to set up your home studio.
As we know, the budget of a home studio setup is under $500, So the gears that we will purchase, won’t need such a large space. You’ll probably just require a corner of a room where there is the least noise if possible. I would suggest choosing a place with zero external sound, but if that’s difficult, choose the least noise place option.
Now, recording a clean voice or instrument sound is the most important and difficult task in a home recording studio setup. Getting rid of the sound while recording is a different topic, but I’ll explain it later in the blog. So just keep on reading it until the end.
Now you must have got a general idea of choosing a place for setting your own home recording studio setup. Just go with the quiet place that’s all.
2. Computer/Laptop
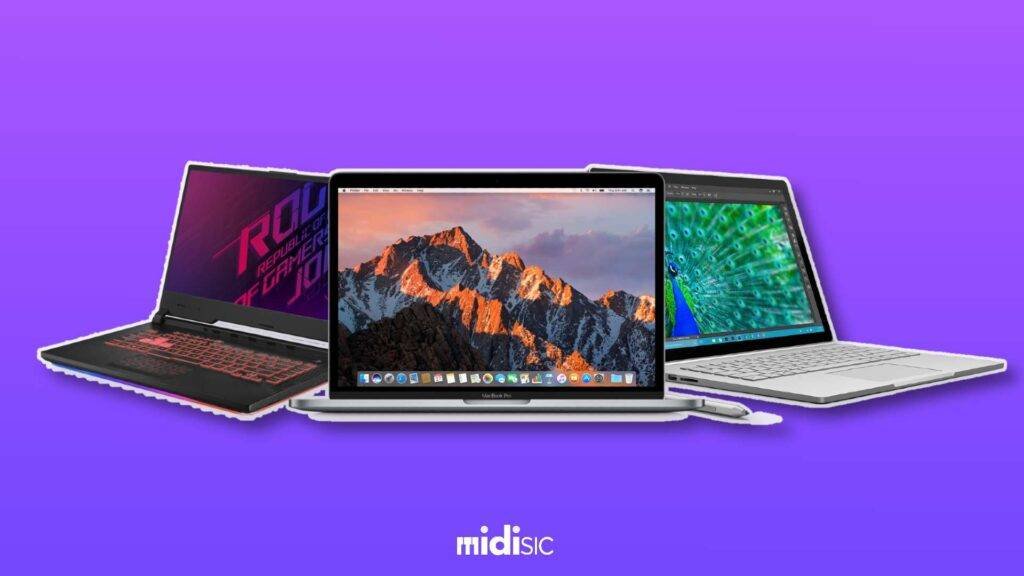
The second most important thing that you need for your home studio setup under $500 is a Computer or a Laptop in which You are going to install your DAW.
These days, everyone owns a computer at their home. Generally, every computer or Laptop is capable of handling the DAW.
You can start making music right now from the computer that you have at your home. But if that machine is not that tough, it might start lagging in between.
So a computer with less power can only be used for the beginning process in music-making. In the future, you are definitely required to do the up-gradation of the same.
If you don’t have a laptop or computer at your home, try to buy the second hand from various websites that provide second-hand service in your area. Buying a second-hand PC will be cheap to buy and can be sometimes the last longing.
And also, if you have a good budget, you can go with MacBook or a powerful Laptop.
Now while selecting the machine, the option that comes here is whether to choose portable laptops or a desktop computer. Both have their own pros and cons. We will discuss this in the later part of the blog. I would just suggest being with us till the end.
If you want to know about choosing between a Desktop and a Laptop, I would suggest you go with our blog – Budget Home Studio Setup Her, I have explained the topic in detail. So yes, you can continue here after reading that blog.
Should I buy a new Laptop or go for the second hand?
Now after coming t the option of buying a Laptop or PC, most people who are on a budget get confused between buying a new one and getting a second hand. Now, let me give you a simple answer to this.
If you are going to produce music on your PC, getting DAW Software is necessary. If you are going with buying the new PC, make sure it has the capacity to handle the DAW. Or else you being under a budget, I would suggest you just go with the second hand.
There are many websites that will provide you with the service of buying second-hand computers at an affordable price. Now by doing this, you’ll get a powerful Computer and that also at way too much lesser price than the new one.
3. DAW Software
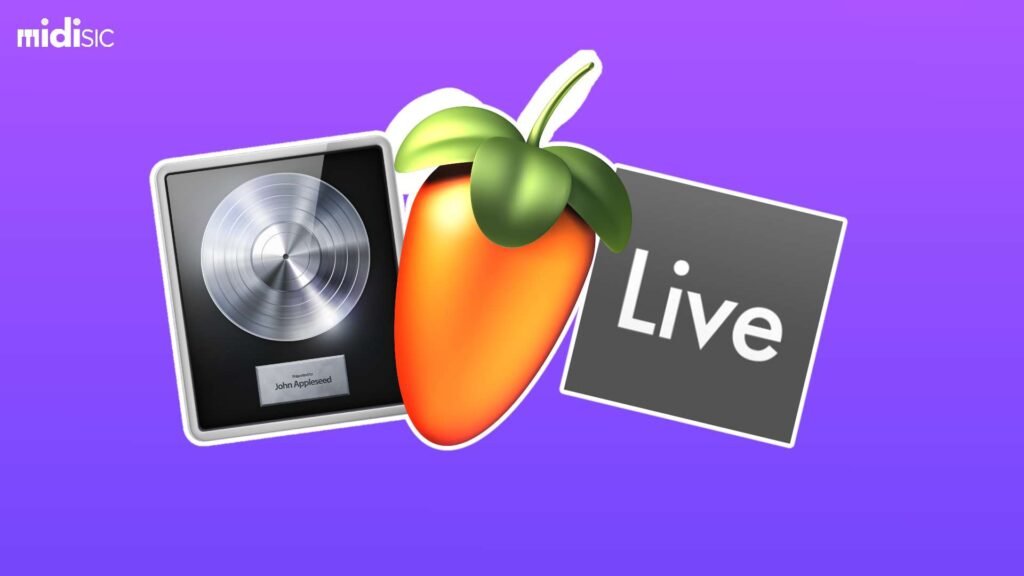
As I already told you about how you can start producing your music using just two things – A computer and a DAW. Well, you got a PC, here is the DAW. But first, let’s know what a DAW is.
So, What is DAW?
Basically, DAW(Digital Audio Workstation) is computer software that allows you to create music by installing it into your desktop computer or laptop.
You will get various different DAWs in the market if you’ll look. Some you’ll get for free while others are paid. Now you might ask me which one is better, The paid ones or the free DAWs? The answer to this question is pretty simple. The paid ones are better. That’s why we pay for them.
Here we’re on a budget, So which one is better? Well, here’s the answer to this.
Free Daws
If you are a music producer who is at the beginning of your career and don’t have much to spend, going towards the free plugins is the best way.
There are many DAWs available in the market that are free to use and have great options. You can use them and start your journey. Later you can always switch onto the paid ones.
Here are some of the Free DAWs that you can use in your music production career.
- Waveform Free
- Cakewalk by BandLab
- Studio One Prime
- Pro Tools | First
- Ardour
- MPC Beats
- SoundBridge
- LMMS
- Podium Free
Paid Daws
With paid DAWs, the options in your music-making get increased. You get more open to the world of creating professional music. You become serious about your profession cause you are investing.
So below, there are some recommended Paid DAWs that you look for
- FL Studio 20
- Studio One 4.5
- Steinberg Cubase Pro 10
- Garage Band
- Pro Tools 2019
- Audacity
- Logic Pro X
- Ableton Live 10
- FL Studio 20
- Bitwig
- Reaper
4. Audio Interface
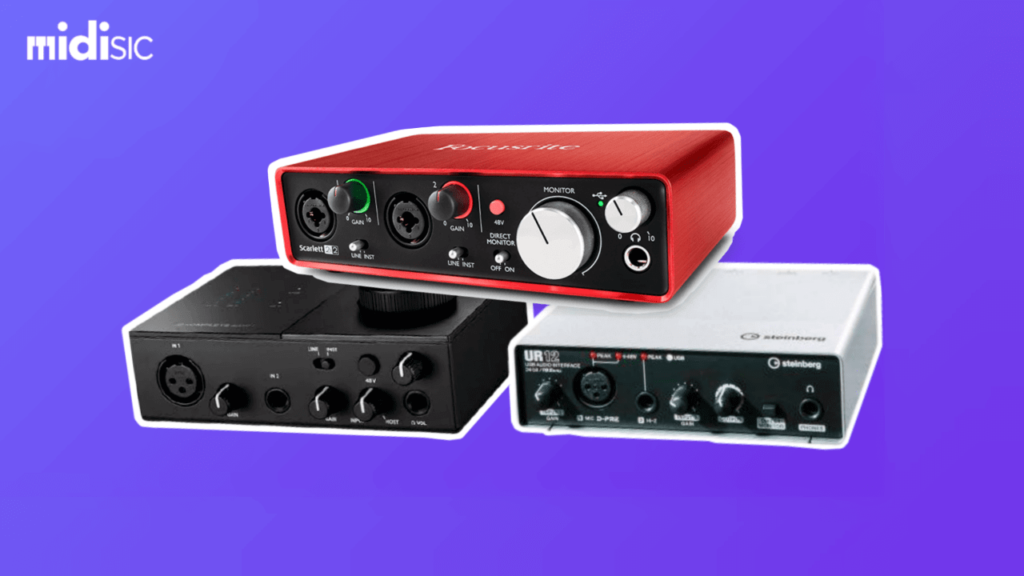
Audio Interface is a device that you use with your mic and other gears like guitar, keyboard, etc at a time. It converts analog signals into digital audio which helps in getting a more clear voice.
Now you have got a computer, a DAW, and a space to set up your own studio, let’s talk about our next gear called Audio Interface. Even after getting all this equipment, you can start making music right now.
How Does Audio Interface Helps?
Audio Interface helps you bring quality sound and makes it easier to record many instruments at a time with minimum latency.
5. Headphones/Monitors
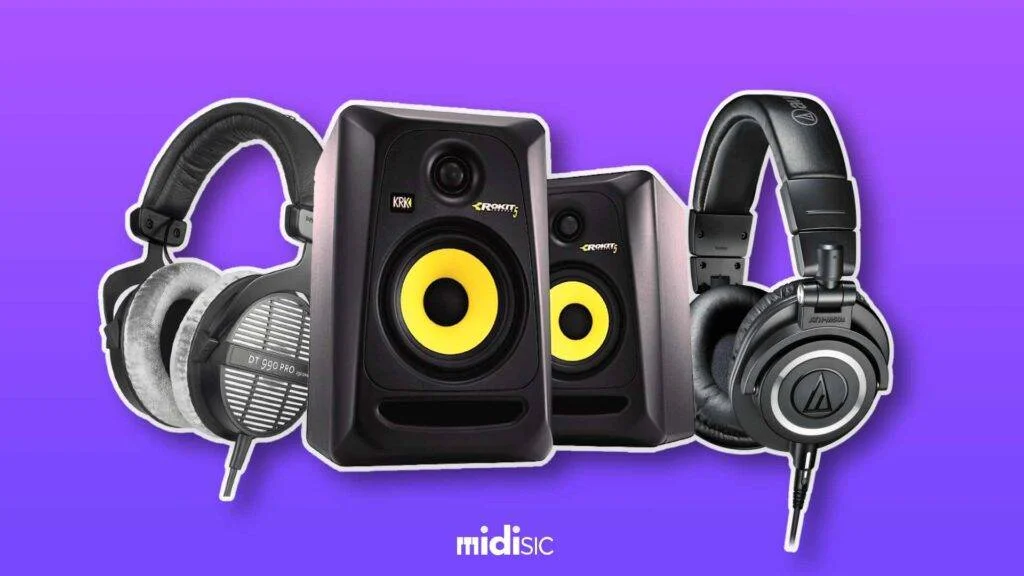
We have come to our next essential home studio setup gear and that is Headphone/Monitors. Well, I’ve mentioned both here – Headphone as well as the Monitors. Now, you may have a doubt about which one is better in a home studio setup.
Well, Since you are building your own recording studio at your home place. That means there are going to be people/family members for sure. In order to avoid the disturbance, My suggestion would be to go with headphones.
Using a monitor and playing the track for the whole day could be disturbing for them. But, If you have your own room and you’ve done the soundproofing of the same, Monitors will be the best. But since you bought the monitors that don’t mean headphones aren’t important.
In order to mix sog from anywhere, Headphones are the most important gear in mixing the track. So if you have the budget, go with the monitors, but just having the headphone in the beginning phase will do the most of your work.
While headphones are portable to use and also are cheap compared to the monitors, but in the mixing quality-wise, Monitors are more effective than headphones. You get extra details of the track that will help you in the mixing and mastering process.
In the conclusion, I want to state that if you are a singer yourself and are going to mix your song on your own, go with the headphones. Because for the recording purpose, you will definitely need the headphones. And if you are just into producing increase your budget a little more and go for the monitors.
If you want to learn more about the best monitor speakers or want to buy the best budget monitor speakers, I would suggest you read this blog, and then go for purchasing the monitors for your home studio setup.
6. Microphone
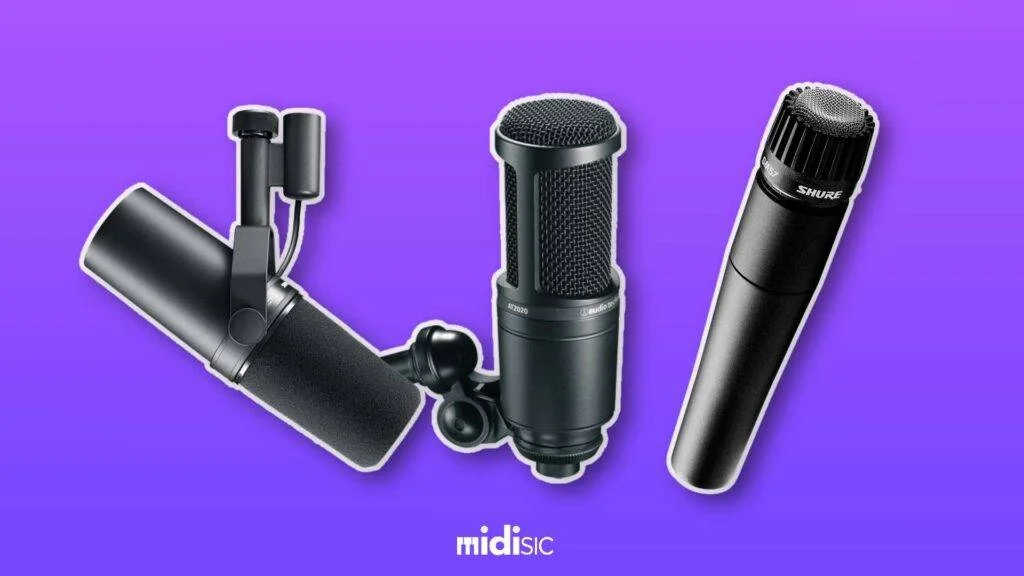
The next thing you’ll require for your home studio setup is a Microphone. The microphone is used for recording any vocals or instruments for your track. Now there are options while choosing the microphones.
There are two types of microphones that are used widely. They are – Condenser Microphone and Dynamic Microphone. Let’s just get to know them deeply in detail.
Dynamic Microphone
You must have seen the dynamic microphones in live performances or in front of the drums. It’s because these mics are made in a way to bear the wear and tear in any way.
The quality of these microphones is tough and can survive through the hit by drumstick or fall on the stage.
One of the main reasons why dynamic microphones are used in live shows is because they aren’t very sensitive in terms of recording the vocals. This helps in not capturing the voice of the audience coming from the front.
If you want to learn more about dynamic microphones or want to buy the best budget dynamic microphones, I would suggest you read this blog, and then go for purchasing the Dynamic microphone.
Condenser Microphone
Condenser microphones are sensitive in nature. These are used in studios where there is no echo or surround sound. While recording with condenser mics, everything should be quiet. They can capture even the low frequencies.
Condenser microphones are bidirectional. That means they can record vocals from both sides. These are used in studios cause they promise to give a quality sound than that of condenser microphones.
If you are a Vocalist, a Condenser microphone will suit you the most, and if you play any instrument such as drums or do live shows, a Dynamic microphone will be the better option.
In conclusion, you can choose any of these both for recording your vocals as well as instruments as per your suitability.
If you want to learn more about Condenser microphones or want to buy the best budget Condenser microphones, I would suggest you read this blog, and then go for purchasing the Condenser microphone.
7. MIDI Keyboard
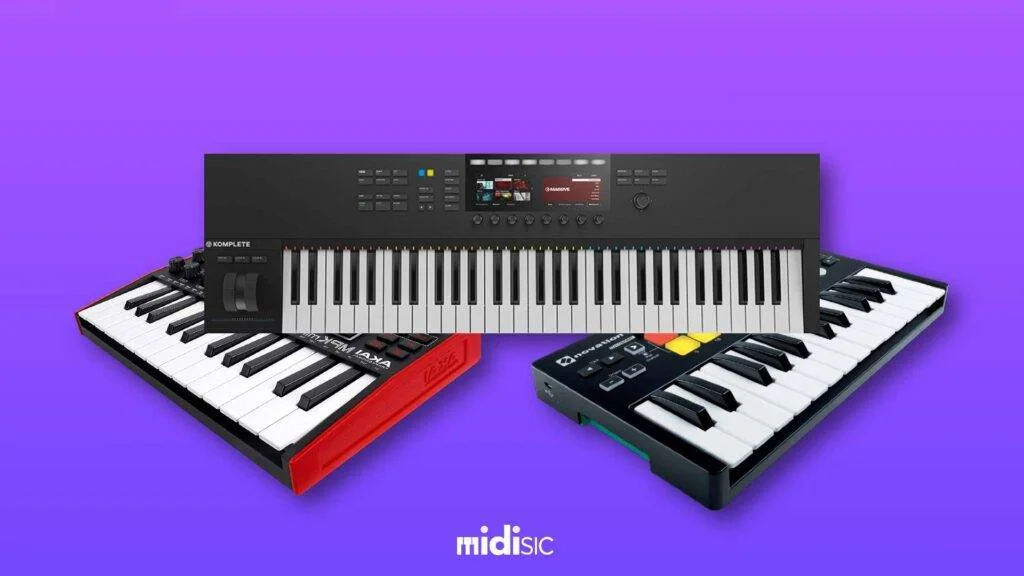
What is MIDI Keyboard? If we talk about the technical formula of a MIDI Controller Keyboard, It’s like – MIDI stands for Musical Instrument Digital Interface. So basically, it is an instrument that transfers the data into already MIDI-enabled devices to produce sounds in a controlled parameter. This is how music is made using MIDI Keyboard.
When we compare the MIDI keyboard with Piano or Digital Keyboards, the MIDI controller does not have its own sound. Whenever the keys of the MIDI keyboard are pressed by someone, the data released from it passes through the software that produces the music. The Synthesizer produces Music that gets amplified through the Studio Monitors.
The piano can produce only sounds that are provided inbuilt. But using a MIDI controller keyboard, you can even make your own sounds and there are no limits for using your creativity on it.
No, you know what a MIDI controller keyboard is. But do you know which one will suit you? There are various types of MIDI controller keyboards. Each one of them is suitable for different levels or say types of studios. Let me just tell you about the types of MIDI controller keyboards and then I’ll suggest which one will be suitable for you for your own home recording studio setup.
Types of MIDI controller Keyboard
1. 25 Key MIDI Controller Keyboard
25 Key MIDI Controllers are basically used by beginners as it doesn’t require a huge place to keep. The keyboard contains 25 keys with 3 complete octaves. They are also available with drum pads on them which makes them easy to use as a drum kit.
If you are entering into music production, and don’t know how to play piano, go for a 25 key MIDI keyboard. Below are some of the best 25 key MIDI controller Keyboards that you should look into.
If you want to learn more deeply about the best 25 keys MIDI controller keyboard, I would suggest you just read the complete blog that’s given below. You’ll learn a lot.
2. 32/49 Key MIDI Controller Keyboard
These MIDI Keyboards are used for those music producers who know to play piano a little bit but are low on the budget. You can easily practice your piano here in these 32 or 49 keys MIDI Controller Keyboards.
These keyboards are mostly used for home studio purposes whereas they also can be seen in some studios. If you know how to play piano and want to use a MIDI keyboard as the instrument while making music, this is the best option for you.
3. 61/88 KEY MIDI KEYBOARD
Well, for the budget home studio setup, these keyboards are the options. 61 and 88 keys MIDI keyboards are generally used in the professional studio.
But if you are a professional piano player, you can go for these. as a large number of keys are going to give you the best feel of the piano.
If you aren’t a pianist and looking for the budget MIDI keyboard for your home studio setup under every budget, I would recommend the 25 key MIDI keyboard in the end. So, don’t worry.
If you want to learn more deeply about the best 61 keys MIDI controller keyboard, I would suggest you just read the complete blog that’s given below. You’ll learn a lot.
4. 61/88 KEY MIDI KEYBOARD
Well, for the budget home studio setup, these keyboards are the options. 61 and 88 keys MIDI keyboards are generally used in the professional studio.
But if you are a professional piano player, you can go for these. as a large number of keys are going to give you the best feel of the piano.
If you aren’t a pianist and looking for the budget MIDI keyboard for your budget home studio setup, I would recommend you the 25 key MIDI keyboard at the end.
If you want to learn more deeply about the best 88 keys MIDI controller keyboard, I would suggest you just read the complete blog that’s given below. You’ll learn a lot.
Okay… By now, we’ve learned about the gears required for a home studio setup, Let’s focus on some extremely important questions that are necessary to keep in mind before investing in a home studio setup.
Things To Remember Before Buying the Gears for Home Studio Setup
Once again, I know how big the decision is to go from Zero to One. You have a dream and you want to make it real. Buying the gadgets and making your own home recording studio setup is the first and the most important step that you’ll take in the path of success as a music producer.
Now, every person has their own capacity of spending on the gears, Of course, everyone wants the high-quality results but vary on the budget part. Well, I am here to give you the Best Home Studio Setup gears for every budget.
Before buying anything, there are certain things that are necessary to understand it. The same rule applies here too. If you are looking for the best gadgets for the best home studio setup under your budget, you are required to have that knowledge.
So, let me guide you through some of the most useful questions and answer them for you. This will give you an idea about your home recording studio setup.
Type of computer required for a home studio setup
As you know, there are two types of PC you can use in your music production studio – a Computer or a Laptop. Below I’m presenting you with the complete options that you’ll need for producing music. Also, there will be the Pros and Cons of the same.
In the end, you’ll know for yourself which one will be better for you to choose.
1. Portability
Desktop Computer
- A desktop computer is best if you aren’t going to use your pc for touring purposes. Because the desktop requires a specific space for itself.
- Mostly, desktops are used in music studios. Here you don’t need it to move here or there. Also, it gives a sense of power in the hands.
- So, if you want to create a studio in your bedroom itself and have no plans to move your machine anywhere else, a Desktop Computer is the best option.
Laptop
- A Laptop is usually what you can carry anywhere.
- Often laptops are used for touring purpose and you can also create music from any corner of your room
- It doesn’t matter if you are sitting at your home or travelling in an aeroplane, you can start with your creativity from anywhere.
Budget
DESKTOP COMPUTER
- You can get the Desktop Computer in your budget.
- The decent PC start from around $650. And with more investment in a desktop computer, you will get more value for your money.
- you can also opt for other spare parts that you can get second hand easily around.
LAPTOP
- Though you have to pay a little high price in order your your convinience.
- There are ,any laptops that you can get second hand at a low price, but the laptops that are for beginner level, might not handle the DAW if used heavy plugin.
- For those heavy one, you have to invest on only bibg budget powerful laptops.
Power
DESKTOP COMPUTER
- Desktop is way more powerful than the laptop that you will get at the same point of price.
- High ram helps to handle the load of your DAW and pluugins that you will be ging to use in future for your music projects.
- Best thing about using a desktop is that you can always upgrade your ram or other parts and that makes desktop computer more powerful than the laptops in a budget.
LAPTOP
- In laptops, you have to invest a lot in order to get the decent amount of power.
- As more you’ll invest, more you will get the RAM and Processor.
- The Mac book will be the best laptop option for you to consider buying if youhave really giid budget as it has all the power needed to be in the music producers laptop.
Reliability
DESKTOP COMPUTER
- Well here there isn’t any comparision between both the devices on the basis of their reliability.
- But I can say that desktops are quite more reliable than the laptops as it’s not move around a lot and thus the living life of the desktop increases.
Laptop
- When considering the beginners budget laptops, you won’t get such warranty as they may start lagging as soon you use it for producing.
- But with the macbook, pr any other high budget windows laptops, you are not going to face any sort of lagging or any other problem.
- Both are durable and can be last long as per your ways of using them.
Now you may have got a general idea of which one to get for your home studio setup considering your budget.
Recording software
After getting yourself a PC, you’ll be required to purchase music production software. With the help of that software, you’ll record, produce, mix and master your tracks.
Basically, without software, you won’t be able to do anything that’s related to music production.
In the market, you’ll get plenty of software that can give you kind of everything to do and that is also for free. But yes, the paid ones have their own benefits and plus features. If you are a complete beginner and don’t know anything about DAW Software, I would suggest you go for the free version in the beginning.
Later being familiar with other DAWs, you can choose any paid ones in the future. This will help you save some budget for other good things.
How do you get the music from the instrument to the computer?
Well, this is a very silly question about how do you get the music from the instrument to the computer. The answer to this will be for those who are very new to the field of music-making.
In order to record music or create your own music, you will be required some of the gears as well as the instruments. In the gears, you’ll be needed a Microphone, an Audio Interface, a PC, and DAW software.
In Instruments, you’ll be required a MIDI keyboard, a Piano, a Guitar, or any other instrument that you want to record.
Now to get the melody or music, either you can record the instruments using a microphone, or with the help of a MIDI controller keyboard, make your own music directly in the DAW software.
Using these processes, you can get your music from the instrument to the computer.
type of Microphone is needed ofr a Home Studio Setup
As I already told you about the types of microphones for a home studio setup under every budget, you must have got the basic knowledge about the same.
Let’s learn about the type of microphone that is used specifically for the home studio setup.
As you know, dynamic microphones are basically used for live shows. Condenser mics having the tendency to capture large sounds should be used inside the acoustically treated room.
If you can’t afford to treat your room in the beginning, you can always use the household tricks to make a low-budget acoustically treated room using the blankets.
The other best option in order to get the clean voice recording using the condenser microphone is building your own DIY Mic Shield. I would suggest you just go and read the complete blog that shows you the methods of building your own DIY Microphone Shield.
Extra Gears you need for a Home Studio Setup
Along with the important gears that are required for a home studio setup under your budget, you’ll also require some of them that are extras but are helpful.
1. Boom Arms
The boom arm is a supportive extension of the microphone. It helps to provide the stability to the mic and prevents it from any shock. Boom arm reduces the chances of any disturbance that can occur during the recording process.
If you have a budget, it will be a definitely good idea to invest in the Boom Arms.
2. Microphone Windscreen
Again this windscreen is also a gear that provides support to the microphone. Well, you can’t use this windscreen on the condenser mics, but if you are using the dynamic mic for recording in your home studio, the windscreen is what will help in preventing the microphone from catching the ‘ph’ sound coming from your mouth.
Now we’ve learned almost everything about the home studio setup. You know about the equipment, its uses, and why should you use them. Let me tell you about the best studio setup equipment for your home under your budget.
How to build a Home Studio Setup under $500
Below are the equipment mentioned that you can buy for your home studio setup for under $500.
DAW Software
Best DAW Software for a home studio setup under $500.
With a budget of $500, It’s better to go for the free ones as I already told you. So, below are some of the best free DAWs that will give the best music production experience.
1. Audacity
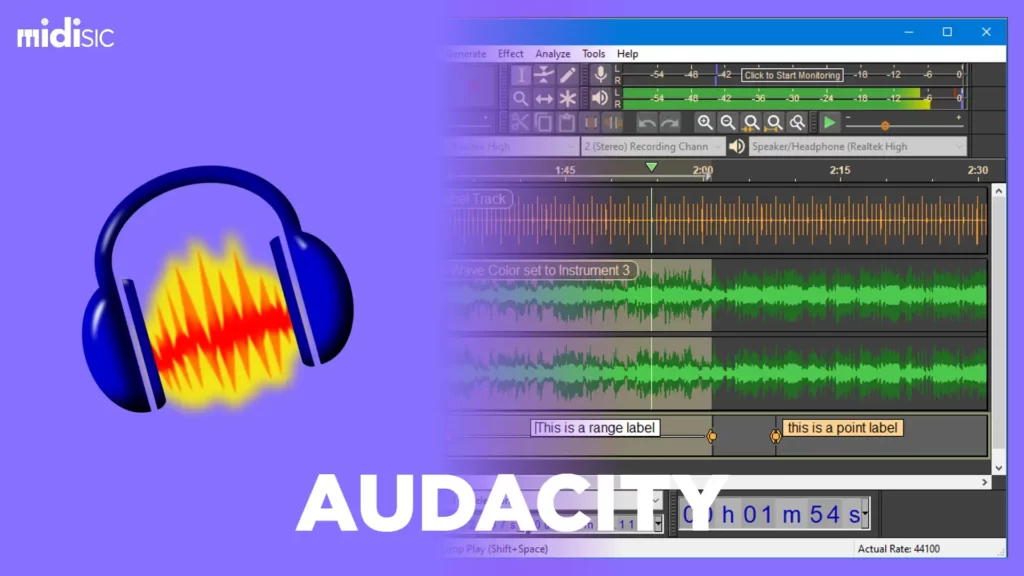
The most famous and widely used DAW software among beginner music producers. It is mostly used to edit the track and for recording. It’s a multi-track audio editor software that allows you to record multiple tracks at a time.
This becomes quite useful for recording a song with various instruments. But, If you use only one audio track, this would be the best option for you and you don’t even need to go for other paid DAW softwares.
Well, the drawback that you’ll face here is that you won’t be able to access the MIDI tracks on Audacity as audacity doesn’t act as a MIDI sequencer. You don’t get any MIDI tracks to use with your virtual instruments. It’s just that you will be needed to record the original instruments.
One more thing that you’ll notice is that using the plugins here in Audacity will be different from using them on pro-DAWs. So you can’t use it as a full production workflow. Audacity is purely focused on the people who are new in the field of the music industry and are on a tight budget.
pros and cons
Pros
- Great capabilities to edit audios
- You can add unlimited tracks
Cons
- Lacks MIDI sequencer
- Not strong privacy policy
2. garageband
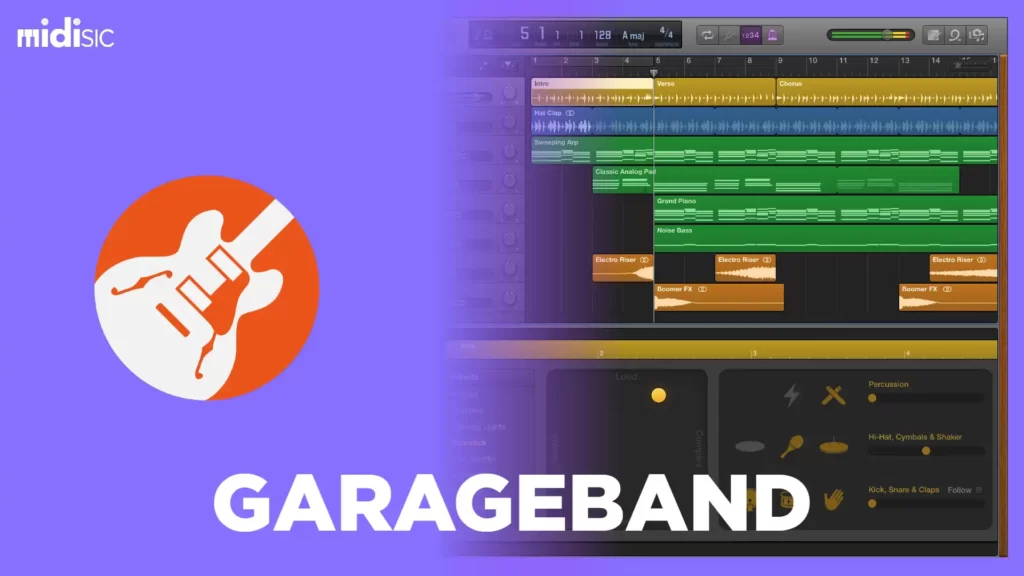
Garageband is Apple’s entry-level DAW software. This software comes bundled with every computer that runs the Mac OS.
Now if you are reading this on your Mac computer, that means you already have this bundle of Garageband.
When you look into the history of GarageBand, you’ll find out that this DAW software has given the way to music to many big artists. We can say, this was the entry gate for many musicians.
Garageband is given the tag as a DAW software for beginners, but let me tell you, surprisingly, the most effective software for making music, even for the late phase of a music producer.
With Apple’s brand name, you get a distinctive and clean design of the software and the ease-in-use feature. You won’t require deep knowledge on using this DAW software as most of the features are basics. And you can learn them in a few days.
so, If you are a Mac user, and looking for an option of the best DAW for beginners, my advice will be that you shouldn’t overlook it. Probably one of the best DAWs and surely the best among the free ones.
PROS and cons
Pros
- Distinctive and modern Interface
- Versatile in use
- Provide various inbuilt software instruments and effects
Cons
- Not as good as Logic Pro
- Only for Mac
- Not available for Windows
3. ableton live lite
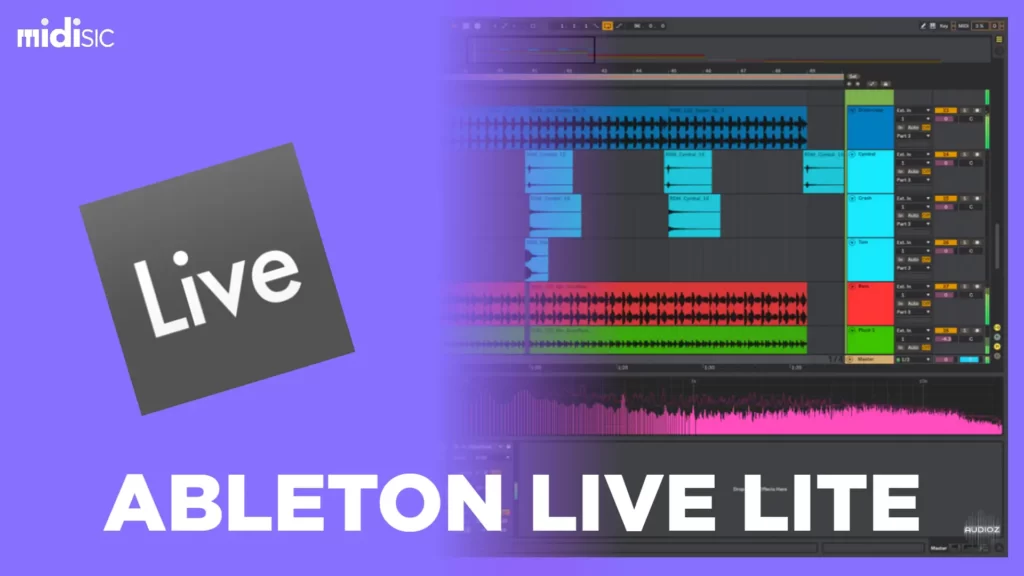
When you think of electronic and sample-based genres, Ableton Live Lite comes as one of the biggest names in the free version, and Ableton Live comes under the biggest name in the paid version on the field.
Well, you can’t get this DAW directly from any store, instead, you can get it bundled with some MIDI keyboard, plugins, etc. And that is also for free.
There is no doubt using this free version that has unique session views from which you can make a song very easily using just a loop.
Ableton Live Lite is a lighter version of Ableton Live that allows you to use popular software packages and your sounds using a MIDI keyboard. The warp features of this DAW software are easy to use and powerful.
You get offered a license for plugins, MIDI controllers, and also even for some ios apps, which means you don’t need to worry about anything.
To make music and use DAW software from your bedroom, you will be needed a proper HOME STUDIO SETUP. And also other STUDIO GEARS that you are needed to look into.
The best thing about using the lite version of Ableton Live is that you’ll get used to the software and in the future if ever you got a budget, you’ll already be familiar with the Pro version of the DAW software.
pros and cons
Pros
- Seemless workflow as same as Ableton Live
- Includes awesome effects and instruments
Cons
- Lite version allows you to just add up to eight tracks
4. PRO TOOLS first
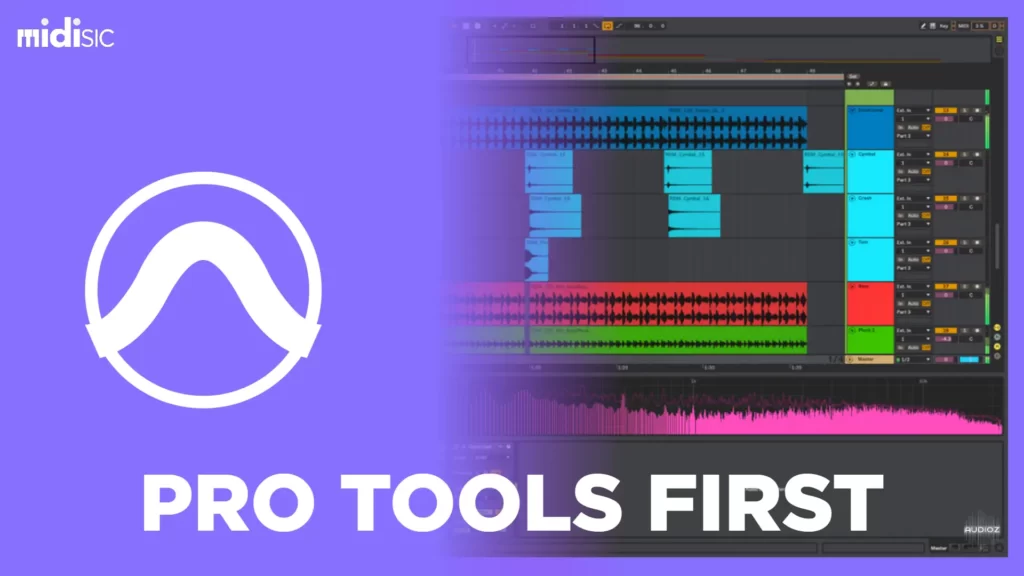
Pro Tools First is the introductory version of a premium version of a Standard DAW software – Pro Tools. You get awesome features that allow you to choose this as one of your options among already available free DAWs.
As it provides a lot of things, you get certain limitations which might make you think again if you want to go for this alternative. The first limitation you get here is that you are allowed to add just 16 tracks of audio and you can use up to 16 virtual instruments.
It comes with 500MB archives of samples which will encourage you to unleash your creativity and you don’t need to worry about it. Also, you get samples templates of multiple genres that are going to help you to create your music immediately.
Even after the limitations, when you’ll visit any big studios, you’ll witness Pro tools as the primal DAW software they are using. So starting from the basic version of the Pro Tools, You will get familiar with its interface and can use the Pro version in the future without any difficulty.
Pros and cons
Pros
- Overall Good quality DAW software
Cons
- A limited number of adding track option
- Fewer effects and sound processors
Audio Interface
Best Audio Interface for a Home Studio Setup under $500.
There are plenty of best audio interfaces that are available under the budget of $500. You can pick anyone among them.
1. Focusrite Scarlett Solo 2-in, 2-out
The range that you get in the Focusrite Scarlett is from $99 to $449. The price depends on the number of inputs and outputs that you select or wish to get. Also with the increase in the budget, you get an increase in the bundle options.
Well, for $500, you can go with the base one. Later will always be the option to upgrade it. So make sure you could save as much as possible for other gears too.
Following are the features of Scarlett Solo:
- You get Audio Interface With quality preamp, low latency drivers and they are super sustainable, 111dB dynamic range
- Along with the software, you get the software bundle of Pro Tools First, Ableton Live Lite 0, Softube, XLN Audio and other Focusrite Plug-ins.
- You also get an Air feature that gives brighter and more open sound.
- A USB cable is provided with the audio interface that is around 3-metres long.
2. M-AUDIO AIR 192-4
The next interface on the list of the best budget audio interface comes is M Audio AIR 192-4. You get the option of direct instrument input, a phantom power switch, and a headphone output on the front panel.
Features of the M-AUDIO AIR 192-4 are:
- Provides 24-bit/192 kHz reolution for professional recording and monitoring.
- For dialing in a perfect level, VU LED meteres are provided.
- For the volume control, you get a large control at the centre.
- You get stereo 1/4″ outs, 1/4″ headphone out with independent level control.
- The roundtrip latency you get is dependent on buffer settings and computer hardware.
3. PreSonus Audiobox USB 96
PreSonus Audiobox USB 96 is well manufactured and smaller in size when compared to its competitors, like the Scarlett series from Focusrite that is given above.
If you have a small room where you have decided to set up your home studio, smaller dimensions of the studio gears could be of a lot of benefits.
Features of the PreSonus Audiobox USB 96 are:
- 24-bit resolution, 44.1, 48, 88.1, & 96 kHz sampling rate
- Along with the PreSonus AudioBox audio interface, you get unlimited audio tracks, MIDI tracks, buses, and FX.
- Also you are provided with a 10+GB of third party software, instruments as well as loops.
Monitors/Headphones
We’ll move towards our best picks for the Studio monitors under your budget of $500. They are the best and the most effective ones.
1. Kali Audio IN-5
Kali Audio Recently released a 3-way sound system with a very sleek design. It produces a high-quality sound but is more pricey than the KRK ROCKET RP7. The sound that comes through the studio monitors is incredible. I think the price that this studio monitor has, come on, you are gonna get the real value for the money that you’ll spend.
Below are the features of the Kali Audio IN-5:
- It has a tweeter and dual coincident.
- Overall performance is finely tuned.
- Provides decent image focus.
- Price-wise, It’s quite high.
2. Focal Shape 50
We got here focal shape 50. If you’re talking about a unique design, this is the one you need. Of course, the price would be a little high but quality-wise, there’s no comparison. There is a woofer below and two subwoofers on Both sides of the monitor.
This speaker is a really strong-sounding machine. If you are the type of person who likes more of a classical approach, a good Vocal quality, this is really the stop you’ve been waiting for.
Features of the Focal Shape 50 are:
- Innovative monitor with amplification given onboard.
- Provides Precise amplification that includes high- and low-frequency shelving.
- Also gives 160Hz crossover slope.
3. KALI AUDIO LP6
Sound-wise and design-wise these are super appealing monitors. Well, I can talk for an hour about this monitor but there’s something that you have to experience on yourself. All in all, Below $200, on entry-level this is something that can compete with any other studio monitors.
Lots of people say that this studio monitor sounds way better than others at the same price.
Features of Kali Audio LP6 features:
- Have a great balance between performance and affordability.
- Has hard bass sound with no chuffing at all.
- Has a good-looking Soundstage.
My Thoughts on Headphones
The headphone can be used for recording, playing back, and mixing your music, and many home studio owners do have that. But, using a headphone for mixing doesn’t provide the proper result.
Tracks mixed using the headphones will sound drastically different on other sound sources. And in order to correct that, mixing with the use of monitors is the best option.
Microphone
Now let’s get to the best budget microphones for your home studio setup under $500. As you know there are two types of microphones. So I’ll mention both.
Condenser Microphones under Budget
1. ATR 2500X – USB
ATR or Audio Technica ATR 2500x-USB is the first on the list of Best budget Condenser Microphones for Vocals Under $100. First of all, let’s talk about the build quality of this bad boy.
Features of ATR:
- Build quality is fairly well
- Long USB cable Type-C
- Low Price
2. AKG P120
If you’re looking for an entry-level xlr microphone for singing vocals or
voiceover, this thing is going to do it all. It’s only $99 and you’re hearing the p120 right now.
The great plus point while buying this mic is the lightweight. Being in your hand, you won’t feel any extra weight of metal. This allows for better accuracy of the input.
Features of AKG P120:
- Cheap and Affordable
- great sound reading
- build quality is good
3. Audio Technica AT2020
Audio Technica’s new at2020 is undoubtedly the best studio microphone you’ll find in the store. I personally used it in my past and trust me the quality is superb for an entry-level condenser microphone.
The polar pattern of the microphone is a fixed cardioid and you won’t find any switches for pads or filters. Though that won’t be any problem for you. Easier the settings in the beginners level, the better the options.
Features of Audio Technica AT2020 are:
- Amazing Quality
- Easy to use
- Great build quality
- Good polar pattern
Dynamic Microphone Under Budget
1. Shure MV7
The first product in the list of Best Budget Dynamic Microphone comes is Shure MV7/ It is an opulent device that is going to offer you the ability to use it with either of the options – XLR or USB output.
You get complete control over the microphone, also this mic does support the option to directly monitor the sound through headphones. When you choose Shure MV7 for the best dynamic microphones, you get a rich and natural sound of your voice.
Features of Shure MV7 are as follows:
- Appealing appearance
- Comes with both the options of USB as well as XLR
- It’s able to control and monitor the sound
- High durability range.
2. SE Electronics V7
Here we are to yet another big brand in the microphone department. BUT, let me tell you, sE took a lot of time to build a dynamic microphone. Although they already knew they will have to compete with the already famous Shure SM series, the sE electronics couldn’t hold themselves behind.
The SE’s V7 is a super-cardioid mic that sounds much smoother in comparison to other microphones in the budget. V7 because of its tight pickup patterns, more subtle combinations gives the advantages of noticeably more levels of good quality mics.
Features of sE Electronics V7:
- Great Build Quality
- Solid Vocal Sound
- Fair Price Range
3. Shure SM 58
the versatility of the Shure SM58 is what made it famous among the whole community of Podcasters, Musicians, Youtubers, and the list goes on. This microphone can be used at any stage.
If you are a singer, in many grand concerts, Sm58 is used. But, this dynamic microphone can only be used for live shows to the performers. If you want to record your song at your home using a microphone, I would recommend going for the best budget Condenser microphone.
Features of Shure SM58:
- Cheap and Affordable
- great sound reading
- build quality is good
MIDI Controller Keyboard
Best MIDI Controller Keyboard for Music Setup for home.
There are plenty of keyboard options available that you can get for your home recording studio setup. As I already mentioned about the types, I will directly come up with the topic of giving you the best options of the type of MIDI controller keyboard for your home studio.
Developing a music setup in the home means less use of space and money. For such conditions, 25 Keys MIDI controllers are the best ones. They are compact in size, easy to handle and the most important point, they are way affordable than the 88 key ones.
You can also go for the 32/49 key MIDI controllers as per your suitability. 88 key MIDIs are for those who are professional piano players. So, unless you are a piano player yourself, I would suggest looking for the 25 key MIDI controller keyboard.
Below are some of the best 25 as well as 32 key MIDI keyboards mentioned.
- AKAI Professional MPK Mini MKII
- Novation Launchkey Mini mk3
- Arturia MiniLab MkII
- M-Audio Oxygen Pro Mini 32
- Arturia KeyStep 32-key Controller
- Alesis V49
- Arturia KeyLab Essential 49
Final Budgeting for a Home Studio Setup
Okay, so here we’re at the end. You have every knowledge about what to buy and the reason behind that. We all know how big the step is to build your own budget home recording studio.
But the most important thing here is to build an excellent studio using less of the money. For that, you are required to have every knowledge about the gears and studio equipment.
But as you read this blog, you’ve gained the information thing. Now, let’s understand the final budgeting of the gears that will lead us to build a home studio under $500.
- COMPUTER – Well, if you have your own PC already, it would be the best option here. But, if that isn’t the condition, you’ll be required to buy a used PC from your friend or online. That will cost you around $100. Well, it’s less to assume for the laptop, but any laptop with the i5 processor will work fine.
- AUDIO INTERFACE – Any best audio interface will cost you under $100. So you don’t need to worry about it at all. You can go with any of the one mentioned above in the list of best budget audio interface.
- DAW – DAW you will get fo free. Also along with the audio interface, the DAW is included. So you don’e required to worry a lot on that department.
- MONITOR – I’ve already mentioned themonitors that are under $100.
So the total here becomes $400. You might be thinking what about the other $100. Actually, those $100 you have to invest strategically. There’s a lot to do yet. The most important thing is doing the acoustic treatment of the room.
Along with that, other important gears like Speaker Isolation, Wall Reflection, Corner base traps, etc are required for a home studio setup.
Extra Tip – Room Accoustic Treatment
As I mentioned above, The room in which you are thinking of setting up your studio is required to be treated acoustically. For that alone, 100s of dollars are needed. But the budget here is only around $500. o what to do?
Well, there are many famous musicians who didn’t have the budget to treat their room. So what did they do instead? Let’s learn that.
They used to use the family closet for recording their vocals or any instruments. Due to the presence of cloths all around, the sound didn’t reflect. You can do the same.
Find a place where there is a lot of clothes. Use that space as your recording area. This will reduce your cost. Later in the future, as you grow, there’re always options for upgrades.
Conclusion
Now as we came to the end of the blog, you have a lot of knowledge about the things you need for your cheap home studio setup. So if you’ve gathered the equipment by now, you may start recording your own tunes and tracks whenever you get the free time.
There is a lot to learn about the gears themselves in the music industry. So keep learning and keep implementing. One day you’ll achieve success.
Remember today you have the vision of setting a recording studio at home, tomorrow you’ll have your own professional studio. The key here is just to keep on working. Make sure you enjoy music while making one. This will help you in the days when there will let downs.
FAQ
The cost of building your own home studio setup depends on the type of equipment that you want. If you are looking for the basic home studio setup for decent quality tracks, it’ll cost you around from $400 to $500. But, if you want to build a quality home studio setup, it’s going to cost you around from $1000 to $2000.
Setting up a Home Recording Studio is extremely easy. But the most difficult task here is choosing the right equipment under your budget. First of all, you are required to think about what is it exactly you want, what’s your budget and the quality of sound you require. According to that, a home recording studio is built.
The mixers are for professional audio and recording engineers. For a home studio setup, instead of using a physical mixer, you can use the DAW. using the DAW and an Audio Interface, you can mix your track easily.
So for your home studio, you do not need a mixer.
There are various things that you can practice in your room in order to improve the sound quality of your tracks. A few of them I’m listing below:
1. Move your speakers from the wall – Well, this is very simple when said, but also the most effective technique. If your speakers are extremely close to the wall or very near to the furniture, then the sound that you hear is reflecting through the walls before entering your ears.
2. Hang Clothes on the walls – Sound waves often travel and reflect through the empty wall. This disbalances the sound quality. In order to get rid of that, you can hang your clothes on the wall. This will prevent the sound from getting reflected.
3. Use Curtain on the Windows – As the windows are made up of glass, they create a huge impact on the sound quality. Use the curtains to cover those windows and you’ll experience a better sound quality on your own.
4. Install carpet on the floor – Since you are asking for the acoustic solution for a home recording studio setup, I would assume that the size of the room is less. So what you can do here is that you can install the carpet on the floor. This will help a lot in reducing the reflection of any unwanted sound frequencies.
This is the question you should be asking yourself. Will you be able to invest in a better microphone? According to me, if you are going with the microphones that I mentioned here, they will be more than enough to give you the quality sound. Yet, if you are not satisfied with the quality, you are free to invest in expensive microphones. But this will only increase your budget. In the beginning, it’s always recommended to start with the low. Understand the gadget, then invest in the bigger one. Hope it helped.
The same answer provided above is suggested here too. Buying the equipment that is under the budget will help you understand them in the first place. Then you have the lifetime to upgrade them anytime. Knowing the ins and outs of the equipment is the most important thing for any artist.
Add the buy button
Add the table
Add the box wrapper
 Over 250+ Pages of Mixing Guide